Thứ Sáu, 28 tháng 9, 2012

New Quilling Technique - Outline Flowers with Multi/ Single Strips

This Quilling tutorial is on quilling outline flowers using scallop strips as per my tutorial with either single or multi strip. These flowers can be used for graphic quilling or to create valentine hearts like my Kiddy Valentine.
This saves the hazzle of quilling each petal separately and pasting. Furthermore, it is very stable once the glue dries and holds the shape well unless you squash it too much.


SINGLE STRIP FLOWER
 Make a scalloped strip as per my tutorial here. first scallop should be long enough to make a circle and glue. The other scallops should be long enough to make petals with.


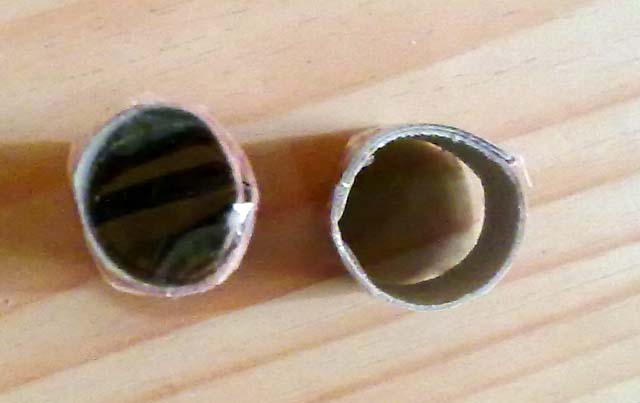
Now make a circle around a cylindrical object like a pencil and glue it. 


 Apply a tad of glue to the next  fold. Apply to the mountain fold side. ( when you fold paper one side is called the valley side the other side will be the mountain side).
  Paste it to the circle as shown above.The distance is determined by the no of petals you require. If you can achieve outdistance you will get a perfect flower. ( the circle is the most stable geometrical shape in nature as you know).


 Continue the same procedure till you come to the last petal. Cut a bit beyond the fold as shown above and apply glue to the mountain and the underside of the extra bit anf glue it to the circlr and the adjoining petal.


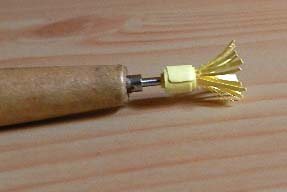
You're done!! shape the circle by inserting a pencil and get the flower into proper shape.


MULTI-STRIP FLOWER

 Prepare a scalloped multi strip as shown above. This flowers is going to be made without a centre.
 Apply glue to the mountain fold side as shown above but apply to both sides and not on the fold itself  as you are going to paste petal to petal'

Glue as shown to create the petal.Continue the process glueing the petals around till you complete the flower. You will need to arrange the petals into a circle and glue as in the flowers below. If required apply a tad of glue to the center to hold all the petals together.

Thứ Tư, 26 tháng 9, 2012

New Quilling Technique Tutorial - Perfect Coils My Way

This quilling tutorial is on how to make proper standardised well uncoiled coils.

Like all rookie quillers, I have been struggling to make standard size quills which unwind well and despite the sizing guide, I usually fail miserably!! So I came up with my invention and the above are the results using cut magazine strips!! Wow!! I'm thrilled and it is so simple a child could have thought of it!!

That"s it folks!! Just two tubes, where the longer tube just fits inside the shorter tube and is pushed up and down like a piston!!. The longer tube has to be capped so guess what? I used cello tape. Looks crude but does the job.

How To Make It
Just cut 2, 1' (outer tube)and 2' (inner tube) strips of card  board or thick paper  the length, 50% longer than the diameter of your desired coil.

The outer tube's diameter will depend on quilling strip length, so take the different lengths you usually use and make a good coil with each length. The outer cylinder's diameter should be this size.

The inner cylinder should be slightly longer ,and fit snugly inside the outer tube and around 2 inches in height max.

Roll the cardboard strip to the diameter desired and cello tape it around. Do the same for the inner tube  but cover the top of the inner tube with cello tape as well. You should be able to slide it smoothly inside the outer cylinder by pushing with the ball of your finger. That's It. Your perfect coils tool.

 How to Use
Insert the capped, longer cylinder into the shorter cylinder and pull it 6mm below the rim. Now wind your strip on a quilling tool or toothpick and twist 1/4 turn anticlockwise and remove from the tool. Flatten the top ( if not you coil will string out like a cone) and drop it into the cylinder so that it sits on the capped inner cylinder as shown and unwinds to the rim. If it does not unwind, just place the ball of your thumb so that it gently touches the top of the coil and twist the tool anti-clockwise to get it to unwind. You can remove the coil by holding the outer cylinder between your thumb and forefinger and the pushing the inner cylinder up with your other hand till the coil is pushed into your fingers. Then glue it!!

Always think of the science behind the art and you can figure things out!! That is my motto.

So why do the last 2-3 layers unwind more??  Simple, the inner coils are held in shape longer as you wind and get more tension. So if you want the outer part to uncoil less, just hold the coil gently after you have finished winding for a count of 3 or more depending on the paper you use, after the whole strip is wound. .

Thứ Hai, 24 tháng 9, 2012

Quilled-3d -Flowers- Pansy Paradise

I quilled these flowers a bit differently though it is based on husking, since I wanted to make them look real.The yellow part of the petal is husked but I have pinched the top so it looks like a V like the  grass in the tree landscape. for the blue part I did not husk as I needed some width at the bottom as well so it could be stuck on top of the yellow, so I made it like in this tutorial which  is here, but I did not encircle them. Just stuck them at the bottom so it expands out  like a V but still had width .


I Used the same zig zag fold technique for the white, but did not pinch to top so as to get loops. I did try the pinched zig zag for the purple flower, but I feel the blue and white one looks better.

The small flowers are very basic but I made them with stems and arranged like a flower arrangement. I find the Japanese, who do really fantastic quilling, tend to do it this way. However the leaves are of three different types.The tutorial for leaf sprig next to the pansy is here.

For the ladybird, I used a 3d cap, which I managed to shape because I allowed it to unwind about a mm. I usually allow a teeny unwind before gluing, which makes pushing out the shape easier.

Thứ Bảy, 22 tháng 9, 2012

Quilling Tutorial - Multi / Single Strip Scallops

This tutorial is on how to make scallops with multi strips and single strips. I have used multi strip scallops as edging in my Kiddy Valentine. This is suitable for use as edgings in cards and quilled pictures.

Multi Strip Scallop
METHOD
 Take about 6 to 8 strips and paste them together at one and then curl all the strips by running your thumb nail along the side of the strips or by rolling the strips.


 Measure 1' or whatever length you want the scallop to be, along the curve of the inner most strip and hold all the strips together as shown above between the thumb and forefinger, then gently push the top strips forward with your forefinger. Pull the other strips  one by one with your other hand  to different lengths to curve in between the 1st and last strips.
If you want standard height for the scallop, you can measure the top most strip to a length to more than 1 inch eg. 1.2'  and push the top strip forward with your forefinger to meet the 1' mark of the bottom strip, then pull the other strips one by one to different lengths. ( the difference between the top and bottom lengths will be the height of your scallop).
Glue all the strips at one point. Use a thin  wet brush to apply the glue. Dilute the glue slightly and apply with the very tip of the brush the glue it.
Continue the process to the length you want.
If you want to curve the edging more, remember that the height of the scallop needs to be more to give allowance for the curvature. Try to understand the physics behind what you are doing and it will be easy as pie!!
Use the natural curve you created at the start and do not pull the last strip too taut if you want a curled edging.

If you want to straighten the edging then you can make it with the last strip pulled taut or you can take the curled scallop and fold it to a valley fold at each point where all the strips are pasted .
If instructions look a bit confusing just look at the pics and you can figure it out.


Single Strip Scallop
METHOD

I made these single strip scallops to make the yellow outline flowers in the Kiddy Valentine piece.
Pinch and make sharp folds at equal intervals on a strip of your choosing. All folds should be mountain folds as shown above.
Now take a thin cylindrical object; a thin handled paint brush or toothpick would do.
Now starting at one mountain fold, put the strip on your forefinger as shown, roll the brush handle hard against your finger upto the adjacent mountain fold.
This will curve into a scallop.
Repeat the procedure from each fold to the next fold and you have your scalloped strip.


Thứ Hai, 17 tháng 9, 2012

Quilled Papercut Picture- Kiddy Valentine

I love paper cutting as much as I like quilling and wanted to combine the two, so this is what I came up with. I have used multi strip method to create the scallop around the heart. I made simple quilled flowers using the petal shape and I used scallops to make yellow and pink outline flowers.

On hind sight I think I should use longer strips to make the flowers so they will be dense and hold the shape better. I also struggled with getting the scrolls uniform, even though I have the circle template. It always pops out when I try to get it out to glue it. So I have come up with a home remedy which I am experimenting on. I also discovered how to make the petal look like the pic below despite using printer paper.
Will share my discoveries in a later post.

Thứ Tư, 12 tháng 9, 2012

Quilling Tutorial New Technique - Graphic quilling monograms, quilling letters, quilling words


This quilling tutorial is on the new technique I adopted in quilling the monograms , letters or alphabets in my graphic quilled piece CHRIS. This is a new technique, as  all the tutorials on quilling monograms that I have seen, give the method I adopted in my previous Quilled Letters Typography piece.

This method would be more relevant for chunky fonts but ensures that  your backing card is free of trace marks or print and also enables you get the the letters at any distance you want and hence gives you a lot of flexibility. What's more you don't even need to get outline fonts!!

Method

Outlining
  1. Choose a font that is chunky and choose the bold font, increase the space between the letters and flip it horizontally to get a mirror image and print it out. 
  2. Print it on the backing paper you want to use for the font. 
  3. Cut out the individual letters with a craft knife. Use the letters for quilling and the paper as a stencil to help you shape the strip for gluing.
  4. Now turn the letters over. Take a strip, the color of your choice, and start pasting the strip , first along the inner edge and then along the outer edge of the cut-out letters.
  5. You can use the stencil of the letters you cut to help you shape and fold the strip. 
  6. Once done, you will have outlined text that can be pasted onto your backing sheet in any manner you want.
  7. No hazzle of measuring on rulers and folding!!  Just use the stencil or the cut out for measurement. Where there are sharp bends, fold the strip ahead but remember if you are measuring around the cut out, fold a mm short or you will not be able to paste it on the edge of the cut-out.
  8. When gluing, use a toothpick  and pick up the glue by rolling the toothpick in it and then roll the toothpick along the edge of the strip and ensure that excess glue does not cling to the side of the strip. Allow the strip to dry slightly before laying it on the cut-out.
  9. If you have pasted the strip slightly inside the edge of the cut-out ease it to the edge by using the other side of the toothpick and rolling it while pushing the strip outwards. Do this before you allow the glue to dry.
  10. All you need to do is to ensure that the strip is pasted to the edge of the cut-out. If not,  don't panic!! You can always cut  the excess off or print out the letter and do it again!!
  11. This method gives you a lot of flexibility and you need not throw out the baby just becoz the bathwater is slightly murky. If one letter gets messed up simply cut out and do a new one.
  12. The flexibility of this method is unlimited as you can arrange the letter at any position or spacing

Filling The Monograms
  1. The next step is to glue the letters onto the backing by applying the glue to the back of each letter and pasting it the way you want it.
  2. Now, to create the design inside the letters, if you want curves, then curl the strip first by pulling the strip between your thumb and forefinger while scraping the nail of your thumb along the side of the strip. This will curl the paper depending on the force applied. The harder , the more the curl. The blunter your nail the better control you will have.
  3. Measure the curve inside the monogram and cut it ( or use the stencil), then paste it and build up your design.
  4. If you want the curve to start inside the letter and continue outside, create the whole curl or swirl that you want , then position the curve over the letters where you want it, cut it where it intersects the letter outline and paste the portion which comes inside the lettering first, then paste the portion outside taking care the curve looks continuous. Do not squash the curl/swirl while working as you will loose continuity. 
  5. If you want to adjust the curve after pasting use a toothpick to nudge the strip into shape before it dries completely.
  6. Work with forceps and keep your finger clean.
  7. Complete the ones extending out of the lettering first before you fill up the letters that way you can correct mistakes and cover them up with filler strips.
  8. If you want sharp edges at the bends, try scoring the line and folding along the line. 
  9. If you want  a dimensional design, then quill the background design first and paste the letters on top. 
  10. You can also use pegs to elevate some of the letters, your choices are endless. 
  11. Lastly a humble request to those who use my technique, please give a link to my blog so that others may learn too.

Thứ Sáu, 7 tháng 9, 2012

Graphic Quilling -Quilled Monogram

I posted quilled monograms or quilled letters in an earlier post where I only outlined the letters or monograms. This time,  not only did I want to quill inside the fonts, but I also wanted to make the the letter outline to cut through  so that a curve which began inside the font, continued outside to depict overlap.

In my previous vector art post, I tried this and was not as successful as I would have liked, but this time I think I figured out how to do it right and hence the transition outside looks much smoother.
However, since I can only get printer paper,  the curves don't hold their shape as it would, if I could get my hand on thicker colored paper.

Didn't want to clutter the outside with too  many swirls as it would detract from the quilled letters.

 I discovered a way that, for me, is easier than sticking the strips on the outline of the lettering, which in my case always ends up making the word look crooked!!  Click here for link to the tutorial.

Thứ Tư, 5 tháng 9, 2012

Comb Quilling Tutorial - Multi Green Leaf with Vein

I have used this leaf extensively in my Petals and Swirls, quilled flower frame. This leaf was first quilled by Anastasia so credit should be given to her. I saw the one with a vein in another site but do not recollect where, so my apologies to whoever it was, as I am unable to give due credit.
The leaf is very similar to the comb flower  but the start is a tad different. 


1

2


3
4
 1.    Paste several shade of green 2' to 4' long, one to the other starting with a light shade. (pic1)
2.     Tear a strip to twice the size of the leaf size you want. Measure leaf size by counting the no of    teeth you want on you comb. One tooth for each loop.
3.    Fold the torn strip in 2 and glue it together to form the vein and glue this piece to the color that you want at the bottom of the leaf.
4.    Take the vein side of your strip and allow the full length of the vein  to poke out, upwards in  the middle section of your comb as in pic2.
 5.   Now take the strip below the tooth and loop it through the next  tooth as shown in Pic3 and thread it down.


5
6


 6.  Now pull it onto the other side making sure you come up through the tooth next to the one with the vein end poking out as in Pic4
7.  Continue like in the flower tutorial, till you have made the no of loops you want . When finished remove off the comb and it should look like pic5.
8.  Now fold it in the center inwards, towards the vein and glue all the loops to the relevant side of the vein as shown in pic6.
9. Take another strip or use the excess strip to wrap round the leaf ensuring you don't crush the loops too much to the center. Pic 7 shows the completed leaf with vein in the center.
You're done!!
7


Thứ Bảy, 1 tháng 9, 2012

Comb Quilling Tutorial - Dimensional Flower


This tutorial is for a double layered comb quilled flower with 3 petals. You can add 2 more petals like the one in Butterfly Garden, if you like.


Flower Petal

Pic3
Pic2
Pic1


  1. Take 3, 11.5 ' strips each of 2 colors.  
  2. Tear in half and paste to the other color to get 6 double colored strips as in Pic1.
  3. Take a comb with loosely spaced teeth. Thread the strip down, starting with the darker color, through a tooth  in the mid section of the comb and bring it back up  as in Pic2.Start threading to the left as shown in the pic.
  4. Leave the end of the strip loose as shown in Pic2 and apply a bit of glue on the top part of this end.
  5. Now fold the strip over the tooth as shown in pic 3 and glue it over the end as shown to form a loop on the left side. ( Pic 3 is shown after the second loop  in the next step is created)
  6.  Now skip over 2 teeth and thread the strip under  the other tooth and back up ( Pic3), pull  back and   paste after applying glue as shown in Pic4 to form the loop on the right side ( 2nd loop).
Pic6
Pic5
Pic4
                                                                                  

7.  At this point if you turn the comb over, it should look like Pic 5 which shows the left or 1st loop, the 2 teeth you skipped and the right or 2nd loop.
 8.   Now bring the strip to the left and thread through the tooth just next to ( going outwards) the one     already threaded ( Pic 6).
9.  Pic 7 shows the way it should look after 3 teeth are threaded or 3 loops are made
10. Continue the same process, creating the loops alternately on either side, till you have made 5 loops on the left and 4 on the right. ( See pic 8 & 9)

Pic7
Pic9
Pic8


10 .   Remove from comb with a forceps and make sure they are aligned one on top of the other as shown in Pic10.
11. Now fold the petal in the middle so that the longest loops meet in the centre and paste the long loops one to the other and make the petal as in Pic11.

                      
Pic10
Pic11
You need not use a comb and can do the alternate looping freehand , but the loops will not look rounded like when you use a comb as the comb enables the mid section to be very flat which give the petal a better appearance.  Instructions are available in my Basic Shapes for Waterfall tutorial.(Leafy Grass)
Stigma


1.    Take a 2.5 ',  1.5 cm strip and fringe it thin. and paste it to a 6' 3mm strip.(Pic12)
2.   Make a tight scroll starting from the fringed end.
3.   Curl the fringe upwards around the centre coil, so that the petals curve in.  (Pic13 & Pic14)
Pic14

Pic12
Pic13


 Making The Flower

1.   Take 3 petals and glue them together as shown in Pic15.
2.   Now take the other 3 petals and paste them slanting upwards as shown in Pic16.
3.   When pasting stanted, make sure to gum the surface touching the bottom layer and the adjacent petals. Further, make sure the glue is slightly dry and sticky before attempting to stick it on.

Pic15
Pic17
Pic16
                 

 4.   Finally , paste the stigma in the middle and curve the fringe upwards and inwards to look like a real flower centre.  Your done!!


Related Posts Plugin for WordPress, Blogger...