I wanted to try my hand at using shaped pegs for petals so I decided to do this frame for which I have used one shaped peg for the lip petal. The rest of the petals are basic tear shaped with spiral centers. The flower is shaped like a butterfly and the stamens are curved above the flower.
here's a closed look:
For the stamens, I have cut a 3mm strip in 4, lengthwise.
Shaping The PetalI used 3, 3mm strips of dark and light purples to make the pegs. When rolling I ensured that it was not too tight so that it is easier to shape. First I rolled the coil between thumb and forefinger as detailed in my
tutorial on shaping pegs and made a convex shape which I shaped to a tear drop by pinching on end; It's much easier to shape the peg, after pushing the peg out to a convex .
Once I had the petal shape, I pushed the coils near the pinched end up to convex it while pushing the coils at the rounded end down. (See pics)
 |
| lip petal |
For the leaves, I made curved, moulded leaves using marquee shapes. You can see the shadow of the curve in the close up below.
The fruit is made by making cup shaped pegs which I have detailed in an earlier tutorial. For more rounded cups, thinner strips should be used.
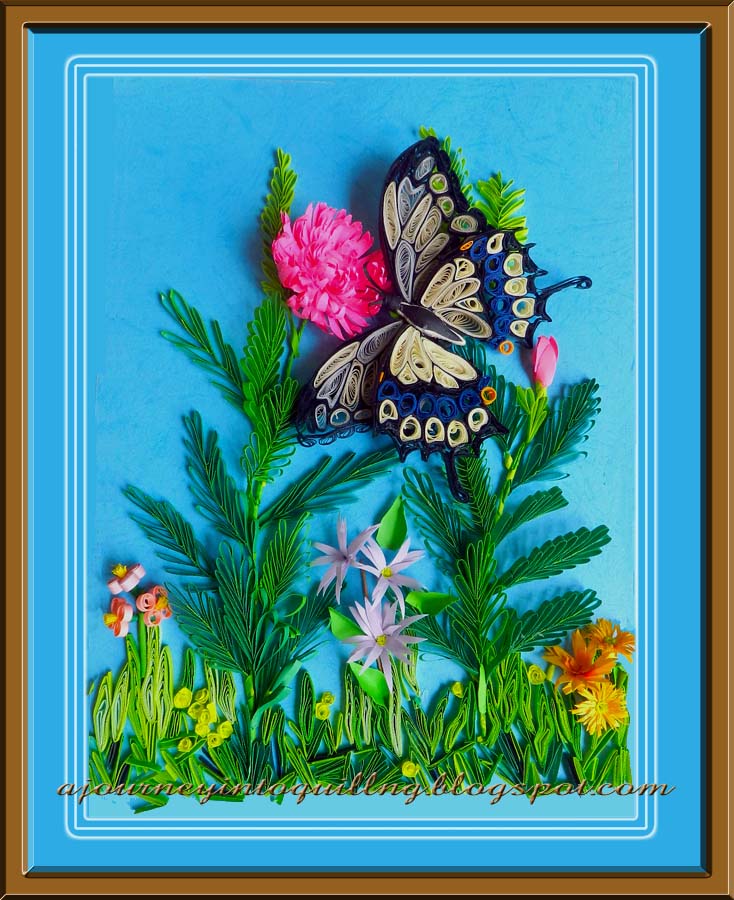
For the butterfly, I have stuck to basic shapes and the body stripes are created by adhering strips of the relevant colors.
I have made a curved cone for the stomach and have glues the butterfly so the wings are at about 30 degrees to the horizontal and not flat on the surface. The butterfly is elevated above the level of the flowers.
The whole arrangement is created by gluing the different elements at multiple levels in order to get a 3D effect.
I generally dislike the side view pics as I dislike the tapering appearance created by this perspective. Hence I do not post this view to show how the flowers are laid out.
I would love to have your feedback. I have been remiss in visiting your blogs to admire your work as I have very limited time on the net at present, but will drop by your blogs as soon as I get a chance. Till then Happy Quilling to you all.


 :
: